Smart Select room fill
Fills a bounded room, floor or wall face from one point, with a review before the area is kept.
Use Smart Select to propose the boundary of an enclosed room, floor or wall face from a point inside it.
Before you start
Availability: Business plan and above. Enabled business features, role permissions, connected providers and supported devices may add requirements.
Documented roles: Owner, Office. A role name alone does not override the permissions set by your business.
Where to find it: Takeoffs > Smart Select.
Check that the visible region is enclosed and that the plan is calibrated. Decide whether openings, voids or other deductions belong in the measured scope.
Using this guide in United Kingdom
- Set your business country in Business settings before entering customer addresses or preparing documents. The country selected on the public website does not change an existing business.
- Check the business currency (GBP), time zone and document tax settings. Only enable tax collection if your business is registered and the settings match your requirements. Your customer invoice tax settings are separate from tax on your AllQuote subscription.
- Screenshots use demonstration records. Their sample currency, addresses and tax amounts do not override your business settings.
- Check the drawing units, calibrate against a known dimension and confirm the ledger unit before applying a material rate. An address or website country does not convert a drawing, assembly quantity or supplier rate. For volume, use consistent area and depth units before checking the cubic quantity.
Step by step
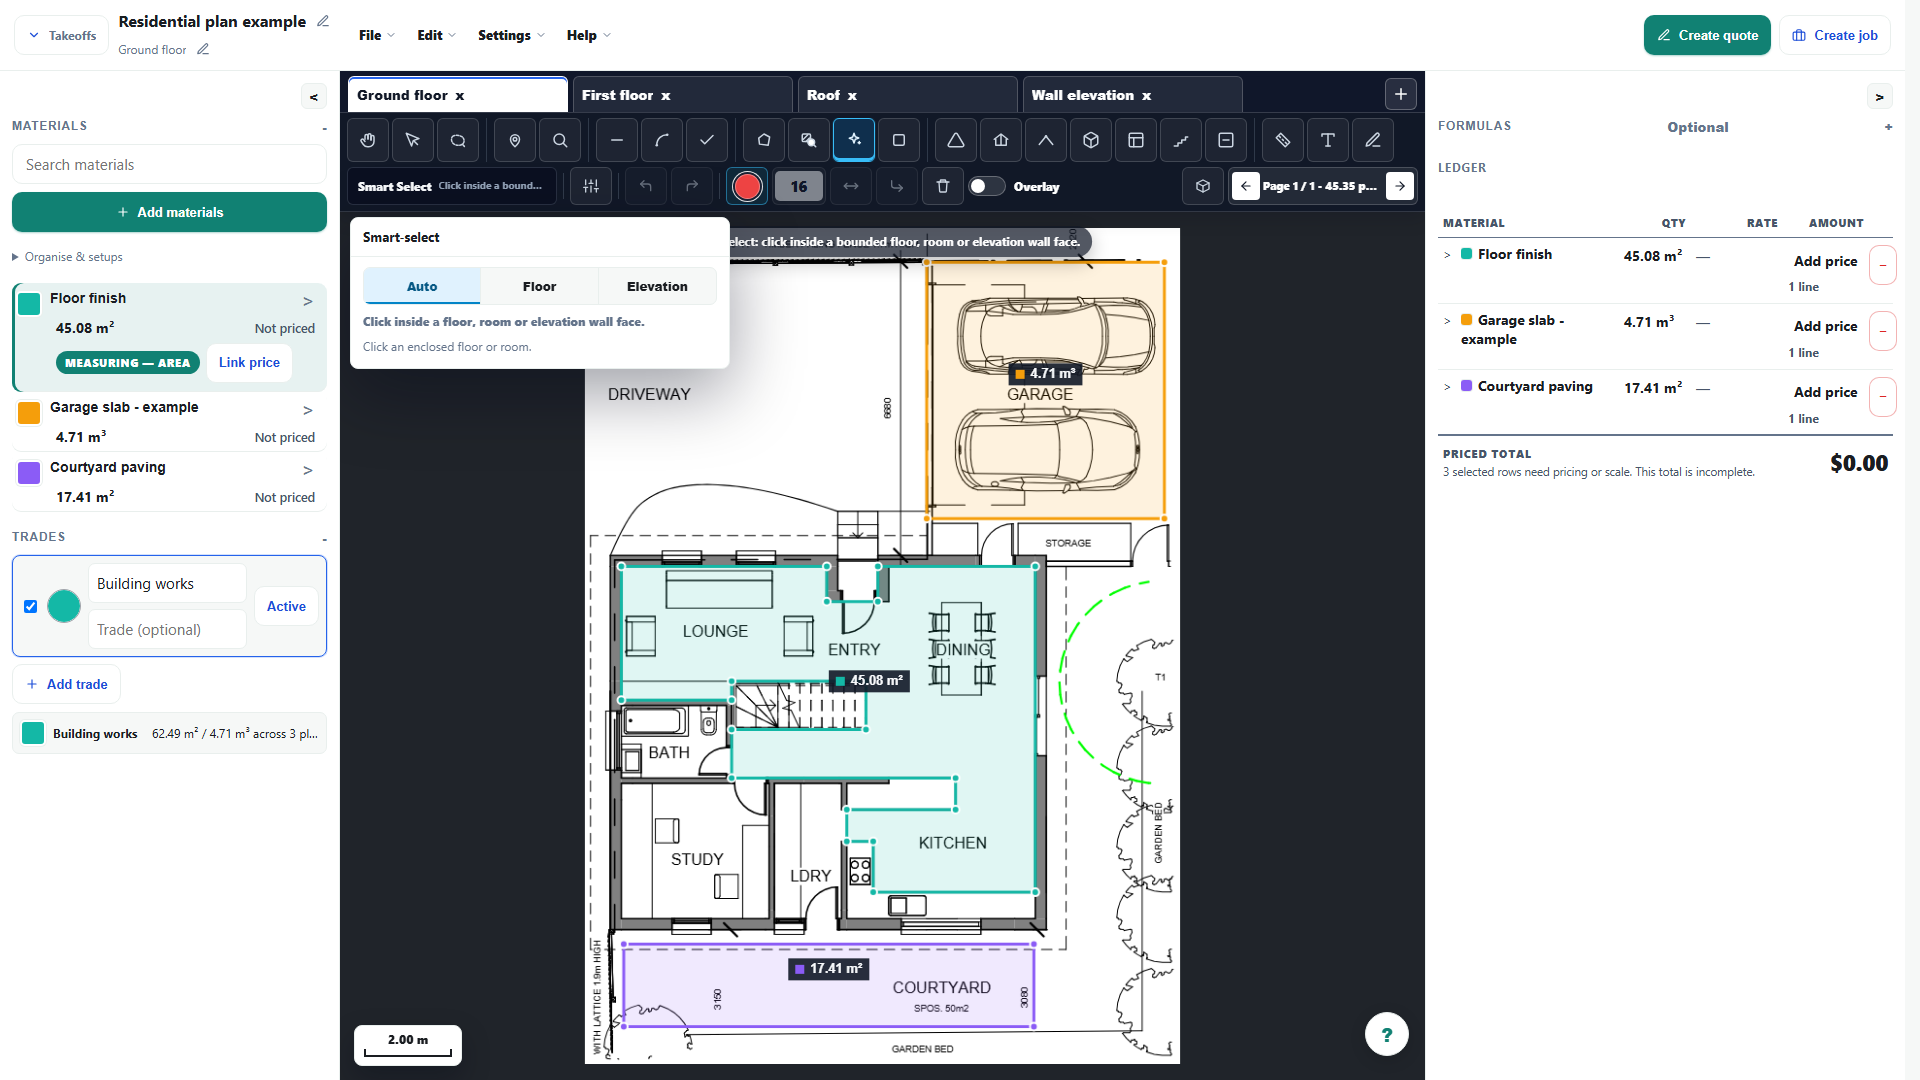
- Choose Smart Select, then click inside the closed room or face you want measured.
- The boundary is worked out from the plan without detection settings to adjust.
- Check the highlighted fill follows the correct walls and does not run through an opening or into the next room.
- Choose Use selection to create the area, or cancel and choose a better point if the boundary is wrong.
Worked example
Select inside a room, inspect the highlighted boundary at door openings and adjoining spaces, then choose Use selection only when the proposed face matches the intended work.
This is an illustrative scenario. Use your own approved scope, quantities, rates and business rules.
Check the result
Zoom around the full perimeter and compare the accepted ledger area with the highlighted region. Correct the geometry or use manual measurement when the boundary is not suitable.
Limits and troubleshooting
A gap or unclear line can connect the room to neighbouring space. Smart Select is a reviewed proposal, not a substitute for interpreting the drawing, and it has no detection settings to adjust.
Open the complete takeoff walkthrough with volume, formula, assembly and overlay examples
Check current plans and feature availability · Browse every guide