Overlay floors and revisions
Places other floors or revised sheets over a base page so you can line them up and check what changed.
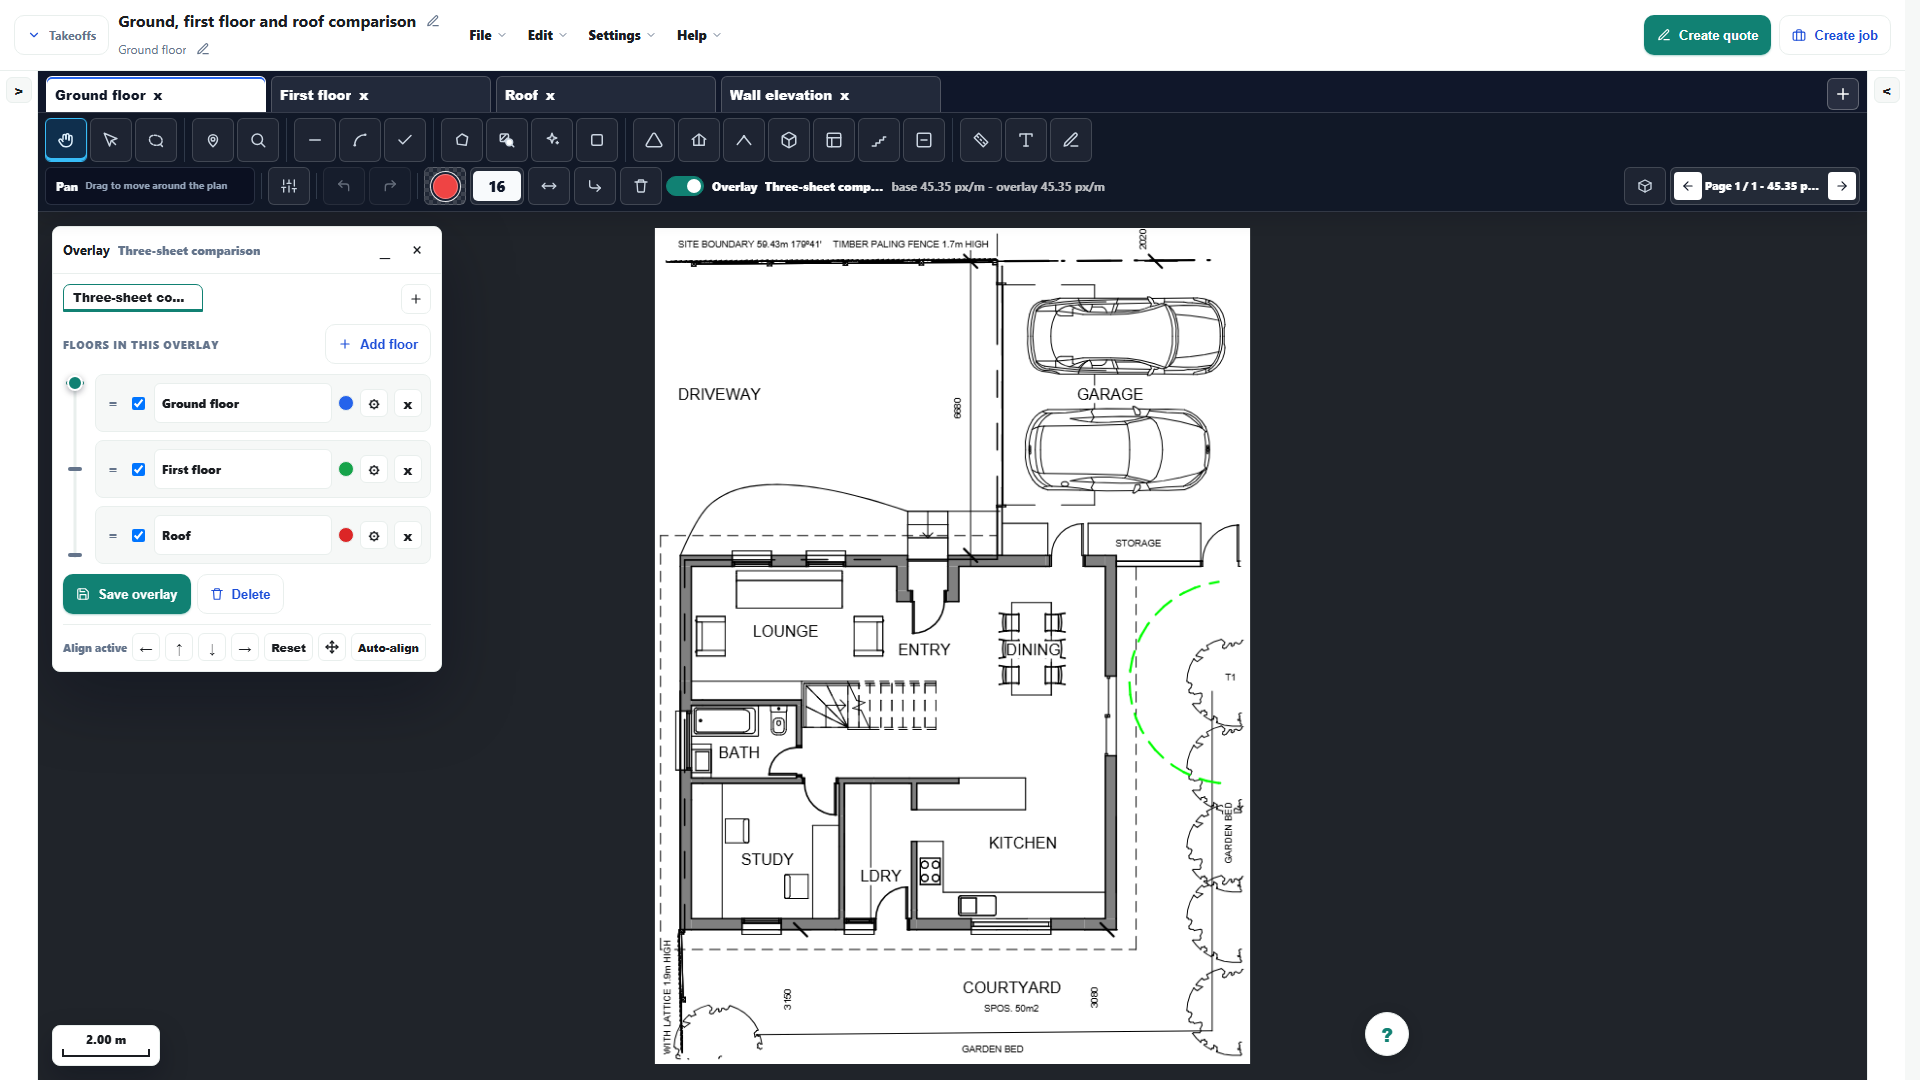
Use overlays to compare drawing layers or revisions while retaining visual context around shared geometry such as the garage and courtyard.
Before you start
Availability: Business plan and above. Enabled business features, role permissions, connected providers and supported devices may add requirements.
Documented roles: Owner, Office. A role name alone does not override the permissions set by your business.
Where to find it: Takeoffs > Overlay floors.
Choose the correct sheets, verify their scale and align shared reference points. Check more than one point so translation, rotation or scale differences are visible.
Using this guide in United States
- Set your business country in Business settings before entering customer addresses or preparing documents. The country selected on the public website does not change an existing business.
- Check the business currency (USD), time zone and document tax settings. Only enable tax collection if your business is registered and the settings match your requirements. Your customer invoice tax settings are separate from tax on your AllQuote subscription.
- Screenshots use demonstration records. Their sample currency, addresses and tax amounts do not override your business settings.
- Check the drawing units, calibrate against a known dimension and confirm the ledger unit before applying a material rate. An address or website country does not convert a drawing, assembly quantity or supplier rate. For volume, use consistent area and depth units before checking the cubic quantity.
Step by step
- Open the base page, turn on Overlay and add the comparison floor or revised sheet.
- Calibrate both pages to the same scale, then align the active layer using shared plan points.
- Compare the layers and check changed walls, openings, fixtures or quantities before updating measurements.
- Reorder floors, set a tint and cross-fade between the checked layers to inspect the revision clearly.
- Right-click blank canvas for available Paste, Select all on page, Start tool (including Count / marker), Zoom to fit, Turn overlay on or Turn overlay off actions. On touch, long-press the canvas with Pan or Select active.
Worked example
The demonstration selects ground floor, first floor and roof, aligns the courtyard boundary and moves the actual overlay slider through both blends and back. Pause the video to compare the garage and courtyard across layers.
This is an illustrative scenario. Use your own approved scope, quantities, rates and business rules.
Check the result
Inspect several shared reference points at each transition. Confirm sheet names and revision dates before deciding whether a visible difference is a design change or a different view.
Limits and troubleshooting
These are three drawing layers, not three habitable storeys or a 3D reconstruction. The demo does not prove automatic alignment or automated change detection; interpretation and alignment checks remain with the user.
Open the complete takeoff walkthrough with volume, formula, assembly and overlay examples
Check current plans and feature availability · Browse every guide